If you’ve ever stood next to a running industrial boiler, you’ve felt that staggering, unforgiving heat—enough to make even seasoned maintenance techs reach for their safety goggles twice. That’s the exact reason RTD (Resistance Temperature Detector) sensors aren’t just nice-to-have add-ons here; they’re make-or-break for efficiency, safety, and avoiding the kind of costly unplanned shutdowns that kill production schedules. As an RTD sensor supplier, I’ve spent the last decade walking boiler rooms with teams of technicians, troubleshooting botched installs, and teaching crews how to get the most out of these tiny, high-stakes tools. Today, I’m pulling back the curtain on how to install an RTD sensor in a boiler—no fluff, just real, field-tested steps that work, plus a few mistakes I’ve seen too many people make along the way. RTD Sensor

First, let’s get one thing straight: not all RTD sensors are built for boiler work. Industrial boilers run at extreme pressures (often up to 150 PSI or higher) and temperatures that can push 1,000°F, plus they’re bathed in corrosive flue gases and turbulent water/steam. Skimping on sensor grade here is like using a household meat thermometer to monitor a blast furnace. I always tell my customers to start with the right tool for the job: a Class A or Class B RTD (that’s the accuracy rating, for the uninitiated) with a platinum element—platinum doesn’t corrode, holds its calibration for years, and is the standard for high-temperature industrial use. Next, pick a sensor with a protection tube rated for boiler-specific conditions: 316 stainless steel works for moderate pressure boilers, but if you’re dealing with high-heat or acidic flue gases, you’ll want Inconel or Hastelloy. Skip cheap aluminum or carbon steel protection tubes—they’ll crack in a year from thermal shock, and you’ll be back under that blistering heat replacing them faster than you can say “downtime.”
Before you even grab a wrench, you need to map out exactly where to mount the RTD. This is the most critical step, and it’s where I see 30% of bad installs go wrong. Mounting location determines whether your temperature reading is accurate (so you can adjust fuel flow to avoid wasting energy) or misleading (leading to overheating, inefficient combustion, or even pressure vessel failure). For water-tube boilers, the gold standard is to insert the sensor into the riser tubes, 2 to 3 feet above the furnace wall—this spot avoids the cold water entering the drum and captures the hottest, most representative water temperature as it circulates. For fire-tube boilers, you’ll want to mount the RTD in the exhaust gas path, midway between the furnace exit and the stack. Never mount it right next to an access door or a pipe joint where cold air can leak in, or you’ll get a reading 50-100°F lower than actual operating temperature. And rule number one: never install an RTD in stagnant water or dead air space. Those spots don’t reflect how the boiler is actually performing, and you’ll end up burning more fuel than you need because your system thinks the boiler is cooler than it is.
Once you’ve picked your spot, it’s time to prep the installation site. First, turn off the boiler and lock out/tag out (LOTO) the power and fuel supply. I can’t stress this enough—boilers have residual heat for hours after they’re shut down, and even a partial startup while you’re working can cause catastrophic injury. Give the boiler at least 4 hours to cool completely; if you’re working on a high-pressure unit, check pressure gauges to confirm they read zero before you touch any piping. Next, drill a hole in the designated spot. The hole size should match your RTD’s protection tube: ½-inch is the most common for standard boiler installs, but check your sensor’s specs to be sure. Avoid drilling into welds or existing structural supports—those areas weaken the boiler pressure boundary and can lead to leaks later. Once the hole is drilled, deburr the edges with a metal file. Rough metal or sharp burrs will scratch the protection tube, creating corrosion points that will fail over time. Wipe the area clean with a lint-free cloth and isopropyl alcohol to remove metal shavings or oil, which can get trapped in the weld later.
Now comes the part that makes or breaks a pressure-tight seal: installing the thermowell (that’s the protective tube that houses the RTD element, right?) and the RTD itself. Wait—yes, you need a thermowell. I’ve seen people try to thread an RTD directly into the boiler wall, and 9 times out of 10, that leads to leaks. A thermowell acts as a barrier between the delicate RTD sensor and the high-pressure, high-temperature boiler environment, making it safe to remove or calibrate the RTD without shutting down the boiler. To install the thermowell first: wrap the threads of the thermowell with Teflon tape (use industrial-grade, not the thin plumbing variety—thin tape will tear at high temperatures) or apply high-temperature thread sealant rated for at least 1,200°F. Thread the thermowell into the pre-drilled hole and tighten it with a wrench—don’t over-tighten, or you’ll crack the boiler pipe or strip the thermowell’s threads. The thermowell should extend at least 2 inches into the boiler medium (water, steam, or flue gas) so it’s fully immersed. For liquid media, it should even be deeper than that, to avoid turbulent air at the surface skewing readings.
Once the thermowell is in place, you can insert the RTD sensor itself. Most industrial RTDs come with a lead extension cable; make sure this cable is rated for the same temperatures as your boiler—standard low-voltage cable will melt in 200°F flue gas, so you need a heavy-duty, high-temperature rated cable here. Thread the RTD’s lead through the access port at the top of the thermowell, and slide the RTD all the way down until it hits the bottom of the thermowell. The RTD element needs to be seated at the tip of the thermowell to get an accurate reading. Leave about ¼ inch of space at the top of the thermowell—this gives you room to secure the RTD so it doesn’t shift from thermal expansion or vibration. Now, seal the top of the thermowell. Most installs use a compression fitting or a set screw to hold the RTD in place. If you’re using a set screw, apply a small amount of anti-seize compound to the screw to make future removal easier, and don’t over-tighten it—you don’t want to crack the RTD element inside. If there’s any gap at the top, fill it with high-temperature silicone or a heat-resistant epoxy to prevent flue gas or water from leaking into the thermowell and damaging the sensor.
After installation, you have to test the setup to make sure it’s accurate and safe. This step is non-negotiable—you could have a perfect install, but a bad seal or a damaged RTD will cause problems down the line. First, do a pressure test to check for leaks. Slowly bring the boiler back up to 50% of its operating pressure, then inspect the thermowell threads, the compression fitting, and the seal around the RTD lead for any signs of seepage. If you spot a leak, shut down the boiler, let it cool, and re-tighten the fittings—don’t leave leaks unaddressed; even a small leak at high pressure can become a major hazard. Next, test the temperature reading. Compare your new RTD’s reading to a calibrated reference thermometer (like a portable RTD or a thermocouple that’s been tested recently) while the boiler is at a steady operating temperature. A Class A RTD should be accurate within ±0.15°F, so if your reading is off by more than a degree, you probably didn’t seat the RTD element properly at the bottom of the thermowell, or there’s air trapped inside the thermowell. To fix that, you can pull the RTD, apply a thin layer of heat-conductive paste (thermal grease rated for high temperatures) to the tip of the RTD, then re-insert it—this fills any air gaps and improves heat transfer.
Now, let’s talk about common mistakes I’ve seen even seasoned maintenance teams make, because these are the things that cause premature sensor failure and bad data. First, cutting corners on the thermowell. I once worked with a plant that used $10 carbon steel thermowells for a 800°F boiler; those thermowells rusted through in 10 months, forcing a full shutdown to replace 12 sensors. Investing $50 in an Inconel thermowell saves you $5,000 in downtime every time. Second, not accounting for thermal expansion. When metal gets hot, it expands—if you clamp the RTD or thermowell too tight during install, when the boiler heats up, the metal will warp, crack the sensor, or leak. Always leave a small amount of clearance for expansion at the top of the thermowell. Third, skipping calibration after install. Even brand-new RTD sensors can get damaged during shipping or rough handling, so always calibrate the new sensor against a reference before you install it, and calibrate the whole setup after installation. Fourth, routing the RTD cable too close to power lines. RTD sensors are low-voltage, so they can pick up electrical interference from nearby power cables, leading to fluctuating or incorrect temperature readings. Always run the RTD cable in a separate conduit, at least 1 foot away from high-voltage power lines.
Once your RTD is installed, don’t just forget about it. Industrial boiler RTDs need regular maintenance to stay accurate. Every quarter, check the seal around the thermowell for leaks, every six months, pull the RTD out and inspect the tip for corrosion or debris, and calibrate the sensor once a year. If you notice the temperature reading is consistently lower or higher than expected, don’t ignore it—small shifts can turn into big problems like inefficient combustion, excess fuel use, or even overpressure events. As an RTD sensor supplier, I can tell you that most premature RTD failures aren’t because the sensor was bad—they’re because of bad installation, poor maintenance, or using the wrong part for the job. A well-installed RTD can last 5 to 10 years in a boiler; a botched install might only last 6 months.
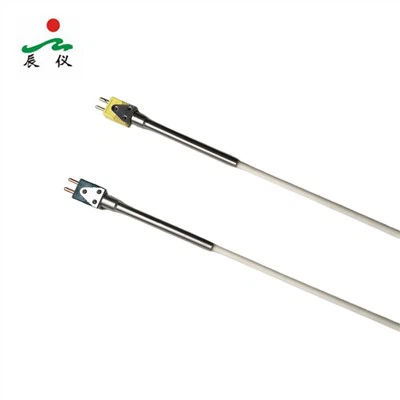
If you’re working on a boiler install or replacement, don’t leave it to chance. Choosing the right RTD sensor and installing it correctly is the difference between smooth, safe operation and costly, dangerous downtime. We have a range of RTD sensors specifically designed for industrial boilers, from high-temperature platinum elements to heavy-duty thermowells built to handle the harshest boiler conditions. Whether you need a single sensor for a routine replacement or a full set for a new boiler build, our team can help you pick the right product and answer any questions about installation best practices. Don’t let a bad install ruin your boiler’s performance—reach out to our team to discuss your RTD sensor needs and get expert support for your next project.
RTD Probe References
- International Society of Automation (ISA). ISA-75.17.01: Thermowells for Industrial Process Measurement and Control. ISA, 2020.
- American Society of Mechanical Engineers (ASME). Boiler and Pressure Vessel Code, Section I: Rules for Construction of Power Boilers. ASME, 2023.
- Omega Engineering. Industrial RTD Sensors: Installation and Maintenance Guidelines. Omega, 2022.
- National Fire Protection Association (NFPA). NFPA 85: Boiler and Combustion Systems Hazards Code. NFPA, 2021.
- Industrial Thermal Solutions. RTD Sensor Performance in High-Temperature Boiler Environments. Industrial Thermal, 2021.
Chongqing Haichen Instrument Co., Ltd.
Chongqing Haichen Instrument Co., Ltd. is one of the most professional rtd sensor manufacturers and suppliers in China for over 20 years, featured by good service and competitive price. Please rest assured to buy high quality rtd sensor for sale here from our factory. For customized service, contact us now.
Address: No.11 Gusheng Road, Caojie Street, Hechuan District, Chongqing City, P.R. China
E-mail: sales@hcsensor.com
WebSite: https://www.hcsensor.com/
