If you’re here, chances are you’ve invested in (or are considering investing in) a heat treatment kiln—one of the most critical pieces of equipment in your metalworking, aerospace, or automotive operations. As a kiln supplier with over 15 years in the game, I’ve seen what happens when installations are rushed, poorly planned, or overlooked: inconsistent part hardness, energy waste, and even costly breakdowns mid-batch. Let me walk you through the actual step-by-step process we’ve refined over hundreds of installs, no AI jargon, just real advice from a guy who’s stood on job sites in freezing Ohio winters and sweltering Texas summers helping clients get their kilns up and running right. Heat Treatment Kiln
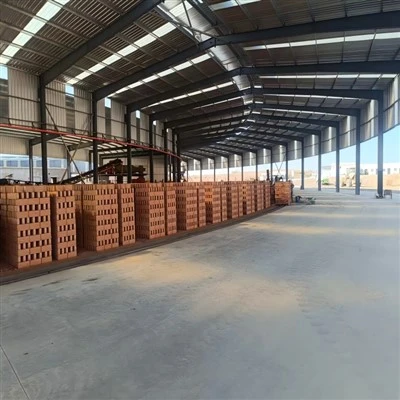
First, let’s cut to the chase: installing a heat treatment kiln isn’t just hauling a big metal box into a warehouse and plugging it in. This is precision equipment designed to reach temperatures up to 2,400°F (1,315°C) while maintaining temperature uniformity within ±5°F (±3°C) across every inch of the work zone. Skip a step here, and you’re throwing thousands of dollars in raw materials and labor out the window.
The first thing I do with every new client is a pre-install site assessment. I don’t just send a sales rep with a brochure—my service team shows up for a full walkthrough 7 to 10 days before delivery, and here’s why it’s non-negotiable. First, floor load capacity. A standard batch kiln for aluminum or steel parts weighs between 20,000 and 50,000 pounds—more if it’s a vacuum kiln. If your warehouse floor has an uneven load rating, like a 10,000 PSI slab in one section and 8,000 PSI near a column, you’ll end up with a tilted kiln once it’s loaded, which warps heating elements and ruins airflow. We always test with a portable load tester, but if you don’t have one, stack 55-gallon drums filled with water in the exact footprint of the kiln and check for floor deflection over 24 hours. Any more than ¼-inch of movement? You need to add a reinforced concrete pad—we can help you spec that, but don’t skip it.
Next, utilities. This is where most first-timers mess up. Kilns are power hogs. A 100-cubic-foot batch kiln pulls 480V three-phase power at 200 amps, which means your existing electrical panel might not cut it. I’ve seen clients try to tap a 100-amp circuit for a medium kiln, and within 10 minutes of operation, the breaker trips and burns out the control board. We require a dedicated circuit with a ground fault interrupter (GFI) rated for continuous use, plus a separate 240V circuit for the exhaust fan—exhaust is another big one. Heat treatment kilns fume off oil, water vapor, and small amounts of metal dust, so you need a 6-inch-diameter exhaust vent that runs straight outside with no sharp turns within 10 feet of the kiln. Sharp bends restrict airflow, leading to pressure buildup inside the kiln that can crack the door seal. If your facility is in a zone with air quality regulations (we work with aerospace clients who have strict EPA rules), we also add a filtration unit to the exhaust during the install to avoid fines down the line.
Once the site is signed off, delivery day comes. This is when you need a crew that knows how to handle this equipment. I never let clients use a local mover that handles pallets and construction materials—kilns are delicate, even the heavy-duty ones. The heating elements are mounted on ceramic shelves inside, so a rough drop can crack those shelves, which would cost $5,000 to replace and add a week to your timeline. On delivery day, we bring our own certified riggers, who use air-ride trailers to lower the kiln onto steel skates so we can slide it into position without scraping the floor or tilting it more than 2 degrees. We also use a laser level to mark exact bolt holes on the floor before lifting—this ensures the kiln is perfectly level from day one, no shimming later.
Now, the install itself. First step is anchoring the kiln to the floor. Most people think you just drill holes and bolt it down, but there’s a trick here: we use epoxy-coated anchor bolts, not standard ones, because they resist corrosion from the fumes. We space the bolts 3 feet apart along the base of the kiln, and we leave a 1/8-inch gap between the kiln frame and the floor—this prevents thermal expansion from warping the frame when the kiln heats up. Once the bolts are tight, we connect the control panel. This is the brain of the operation, so we mount it 3 feet away from the kiln, at eye level, with a clear view of the operator—never in a corner or behind a stack of parts. We run all power and communication cables in rigid metal conduit, not flexible tubing, because metal conduit protects against electrical interference from welding equipment nearby, which would mess up temperature readings.
After the control panel is connected, it’s time to run the heating elements and thermocouples. This is the part that takes the most precision, and I always do this with two technicians. Thermocouples are the sensors that tell the control panel what temperature the kiln is at—we mount four thermocouples: one at the top, bottom, left, and right of the work zone, to check for uniformity. If they’re off by more than 5°F, you’ll get inconsistent heat treatment on parts. We also test every heating element for continuity with a multimeter before closing the kiln door—any element that shows a break gets replaced right there, not after you’ve turned the kiln on.
Once all the internal components are connected, we do a pressure test. A sealed kiln shouldn’t lose more than 0.5 PSI of pressure in 10 minutes. If it drops more than that, you’ve got a leak in the door seal or the exhaust port. We use a smoke pencil to find small leaks—you’d be surprised how often a seal is misaligned by a fraction of an inch, and that’s enough to let cold air in. Fixing that now is way easier than trying to troubleshoot uneven heating during a production run.
Now, the part most clients rush: commissioning and calibration. This is when we run a “burn-in” cycle before you put production parts in. We heat the kiln to 200°F, hold for 2 hours, then ramp up to 1,000°F, hold for another 4 hours, then let it cool down slowly. Why? This bakes out any residual moisture from the insulation in the kiln walls—moisture would turn to steam and damage the insulation at full temperature. During this cycle, we check every thermocouple against a reference thermometer we carry with us (NIST-traceable, so the readings are accurate for compliance). We also adjust the air flow dampers to make sure each side of the kiln is getting the same amount of air, which is key for uniform heat. For vacuum kilns, we add an extra step: a vacuum leak test that pulls down to 1 millitorr, and we hold it for 30 minutes to confirm it doesn’t rise.
After commissioning, operator training. I can’t stress this enough—even the best kiln will fail if your team doesn’t know how to use it. We don’t just hand over a manual and leave. We spend 2 full days training your operators on everything: how to load parts correctly (stacking parts too tight blocks airflow), how to set temperature cycles for different materials (aluminum needs a slower ramp rate than steel), how to check for common issues like a faulty thermocouple, and even how to perform basic maintenance like changing air filters and cleaning the door seal. We also provide a quick-reference cheat sheet that hangs next to the control panel, so operators don’t have to flip through a 100-page manual during a production run.
Wait, I know what you’re thinking—what about permits and inspections? A lot of clients forget this step, especially if they’re in a smaller city. Heat treatment kilns are classified as industrial equipment, so you’ll need a permit from your local building department to install it, and maybe an electrical inspection from the fire marshal, especially if you’re using natural gas instead of electric. We handle all the permit paperwork for our clients, so you don’t have to deal with waiting at city hall or correcting code violations.
I’ve had clients call me a month after install saying they saved $10,000 on scrap parts because we got the temperature uniformity right, and others who cut corners and had to replace a heating element 6 months in because they skipped the floor load check. The difference is in the details. Installing a heat treatment kiln isn’t a one-size-fits-all job—every facility, every product, every production schedule is different, so we tailor every step of the process to your needs.
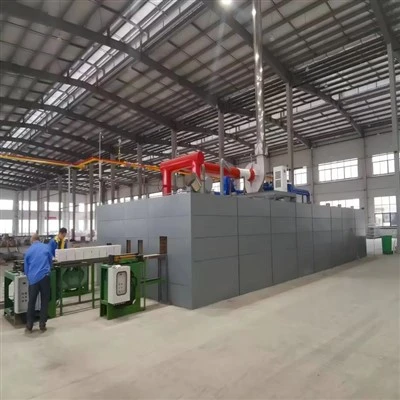
If you’re planning to install a new heat treatment kiln and want to make sure it’s done right, without the headaches, feel free to reach out to our team to discuss your project. We’ll walk you through every step, from site assessment to operator training, so you can get up and running with a kiln that’s reliable, efficient, and gives you consistent results every time.
High Temperature Tunnel Kiln References
- American Society for Metals (ASM International). Heat Treater’s Guide: Practices and Procedures for Irons and Steels, 5th Edition. ASM International, 2019.
- National Fire Protection Association (NFPA). NFPA 86: Standard for Ovens and Furnaces. NFPA, 2022.
- Occupational Safety and Health Administration (OSHA). Industrial Ventilation: A Manual of Recommended Practice, 30th Edition. OSHA, 2021.
- American National Standards Institute (ANSI). ANSI Z21.54: Standard for Gas-Fired Industrial Furnaces. ANSI, 2020.
- Kiln Technology Association. Installation and Commissioning Guidelines for Industrial Heat Treatment Kilns. Kiln Technology Association, 2018.
Henan Yaxin Kiln Co., Ltd.
Henan Yaxin Kiln Co., Ltd. is one of the most professional heat treatment kiln manufacturers and suppliers in China. With abundant experience, we warmly welcome you to buy high quality heat treatment kiln with the latest design from our factory. Good service and punctual delivery are available.
Address: Jixian Industrial Zone, Shangqiu City, Henan Province
E-mail: 1543563178@qq.com
WebSite: https://www.hnyxkiln.com/
